This has been an interesting process.
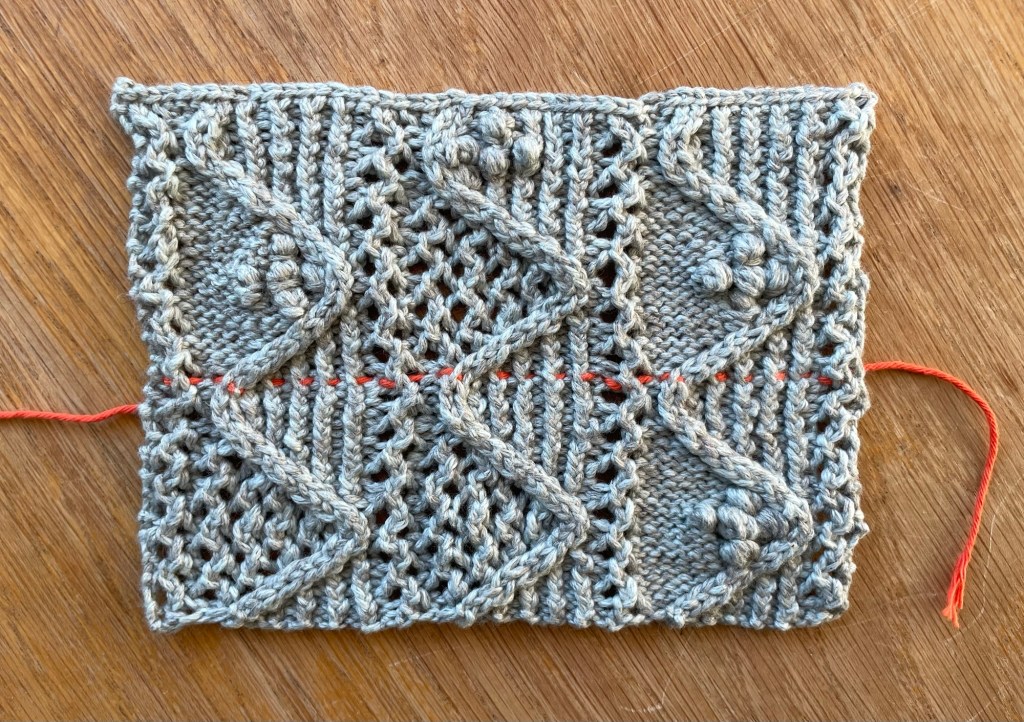
The plan, from Test 1, was to knit 3 pattern repeats across the width, using the printed pattern up the right, for reference, and a more open pattern of my own for the other two repeats, to see if these together might create a better grille effect.
I’m pleased with my new pattern which successfully extended the vertical openwork columns into a net. It’s fiddly around the travelling stitch and the successful 24 rows (under the orange safety line) were emphatically not the first knitted, so I was also glad I’d got it right.
Sadly, it wasn’t fit for purpose as the grille’s very structured appearance was lost when the open patterns were set side by side. Time to change the formula again.
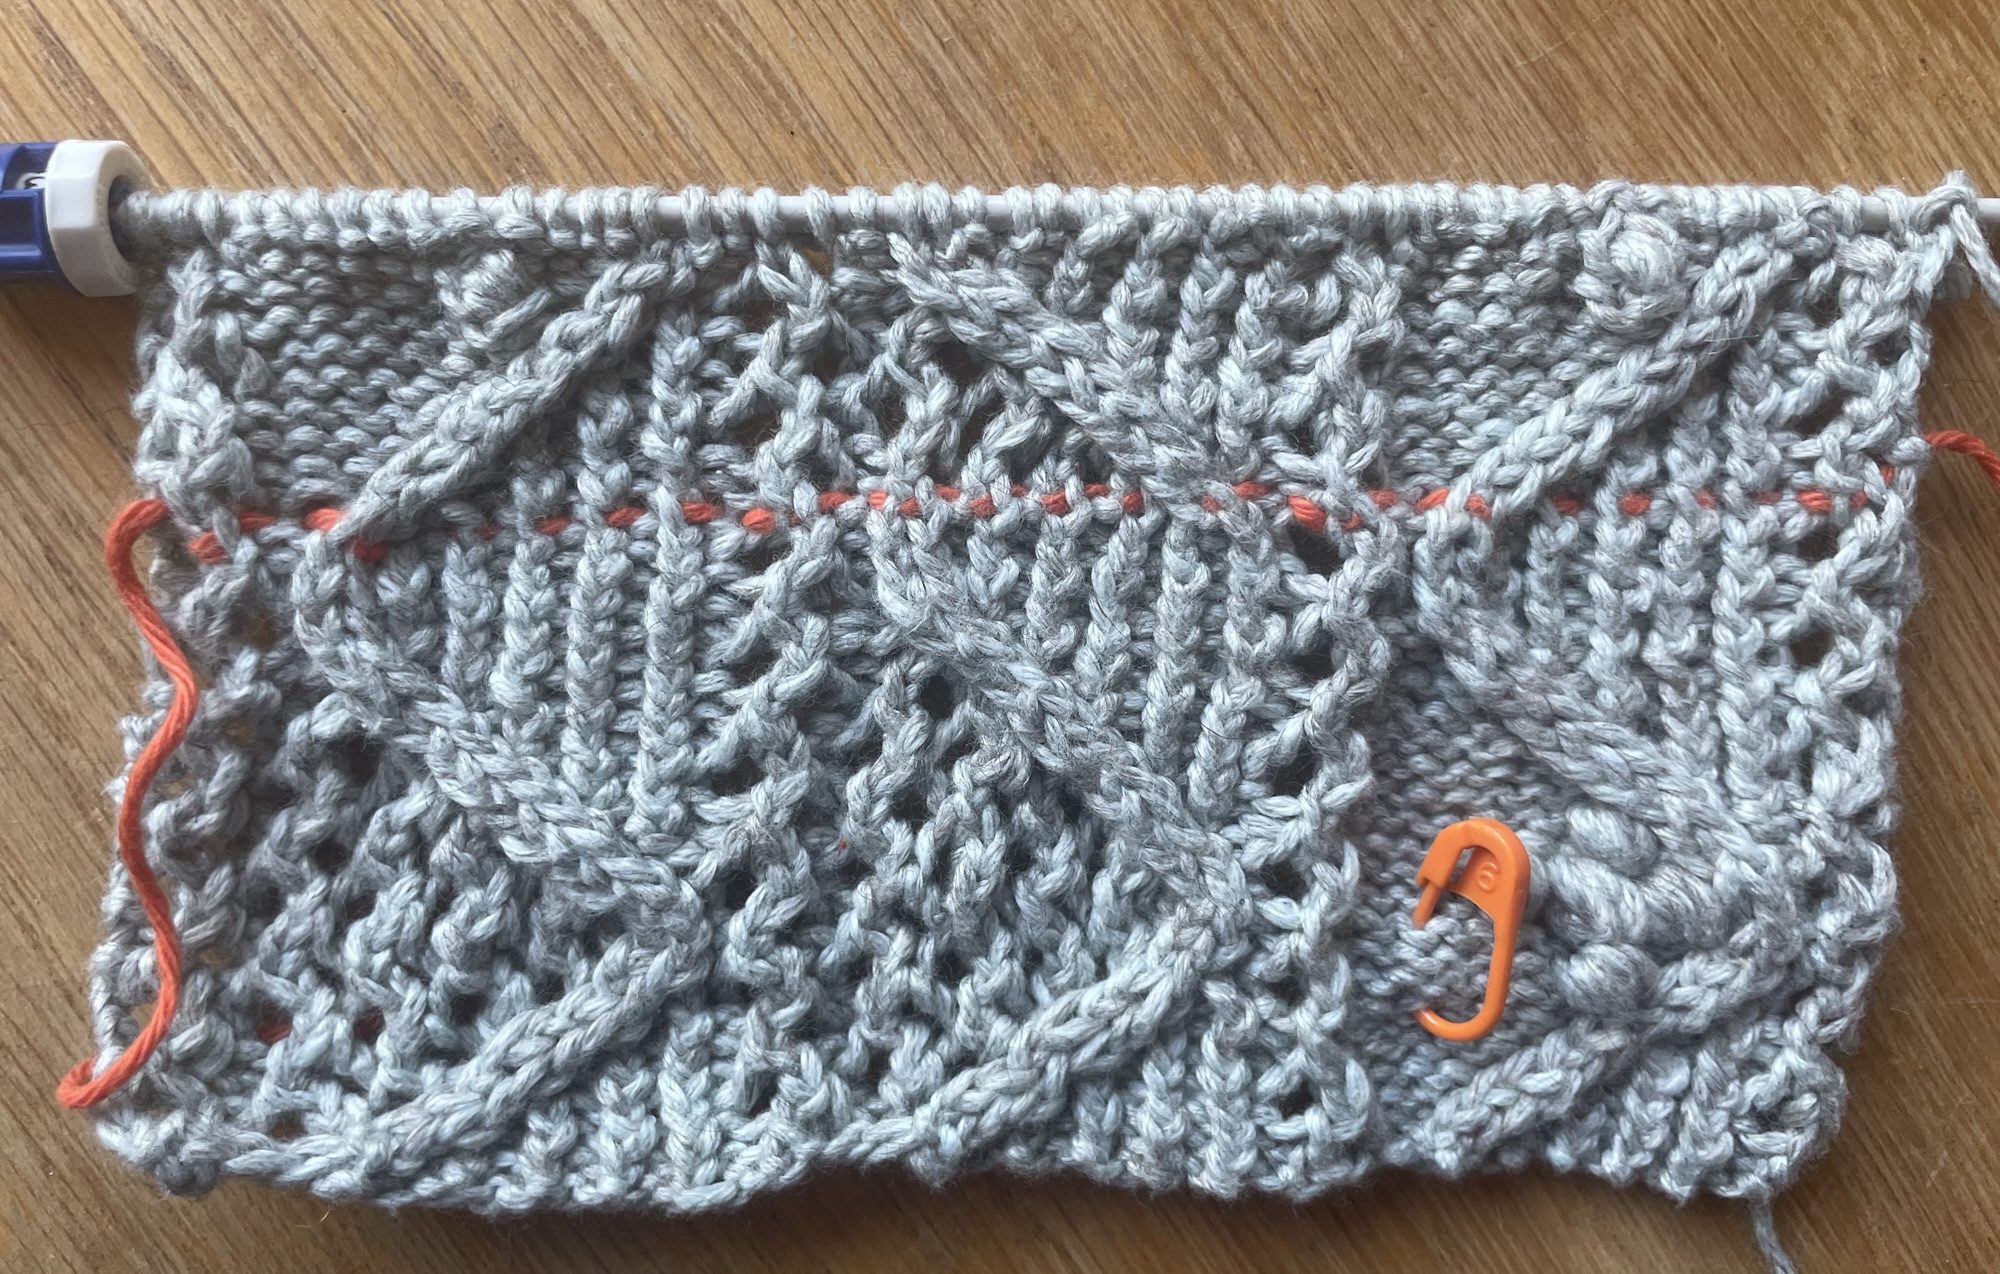
The next plan was to knit the printed pattern on the outside repeats, with my new pattern in the middle, but staggered so the centre zigzag would move in opposition to the others (see the rows above the safety line in the pic). After just 12 rows, I could see it wouldn’t work because the grille itself is in sync horizontally, so the relationship between physical object and knitting was lost again.
You’d think I might have considered that sooner!
Still, it wasn’t wasted time. While knitting that short test I realised I could easily place the bobbles on the ribbed section rather than on the net (doh!), and this would put them out of sync with the bobbles in the main pattern while the zigzags would move together. Just a nod, then, to the positioning of the curlicues.
I wasn’t even worried about the bobbles. (New skill not so rejected after all.)
So I ripped back to the orange safety line and started yet again, with my new pattern (plus bobbles!) in the middle and the original published pattern on either side. The result is in the main image at the top of the post, with this idea now above the safety line.
Resources
- Rowan Softyak DK, shade Coast (248) – from stash, just for the test
- 3.25mm knitting needles
- 2.5mm crochet hook
What I did
- Cast on 52 stitches using 3.75mm needles
- Knitted the 24 rows of a full pattern repeat + 2, to include the final bobble for the middle section (I excluded the one that should have appeared on Row 1).
I’m not going to pretend this was easy, because it was not! Going in and out of these two closely related patterns messed with my head, but I made a chart to keep me in the right place and took it slooooowly. It helped that the work so far had established the basic pattern. A couple of errors along the way that I botched around or left, notably the first of the new bobbles is in the wrong place, but I know what I did wrong and the others are correct so I’ll get it right next time.
What needs to change
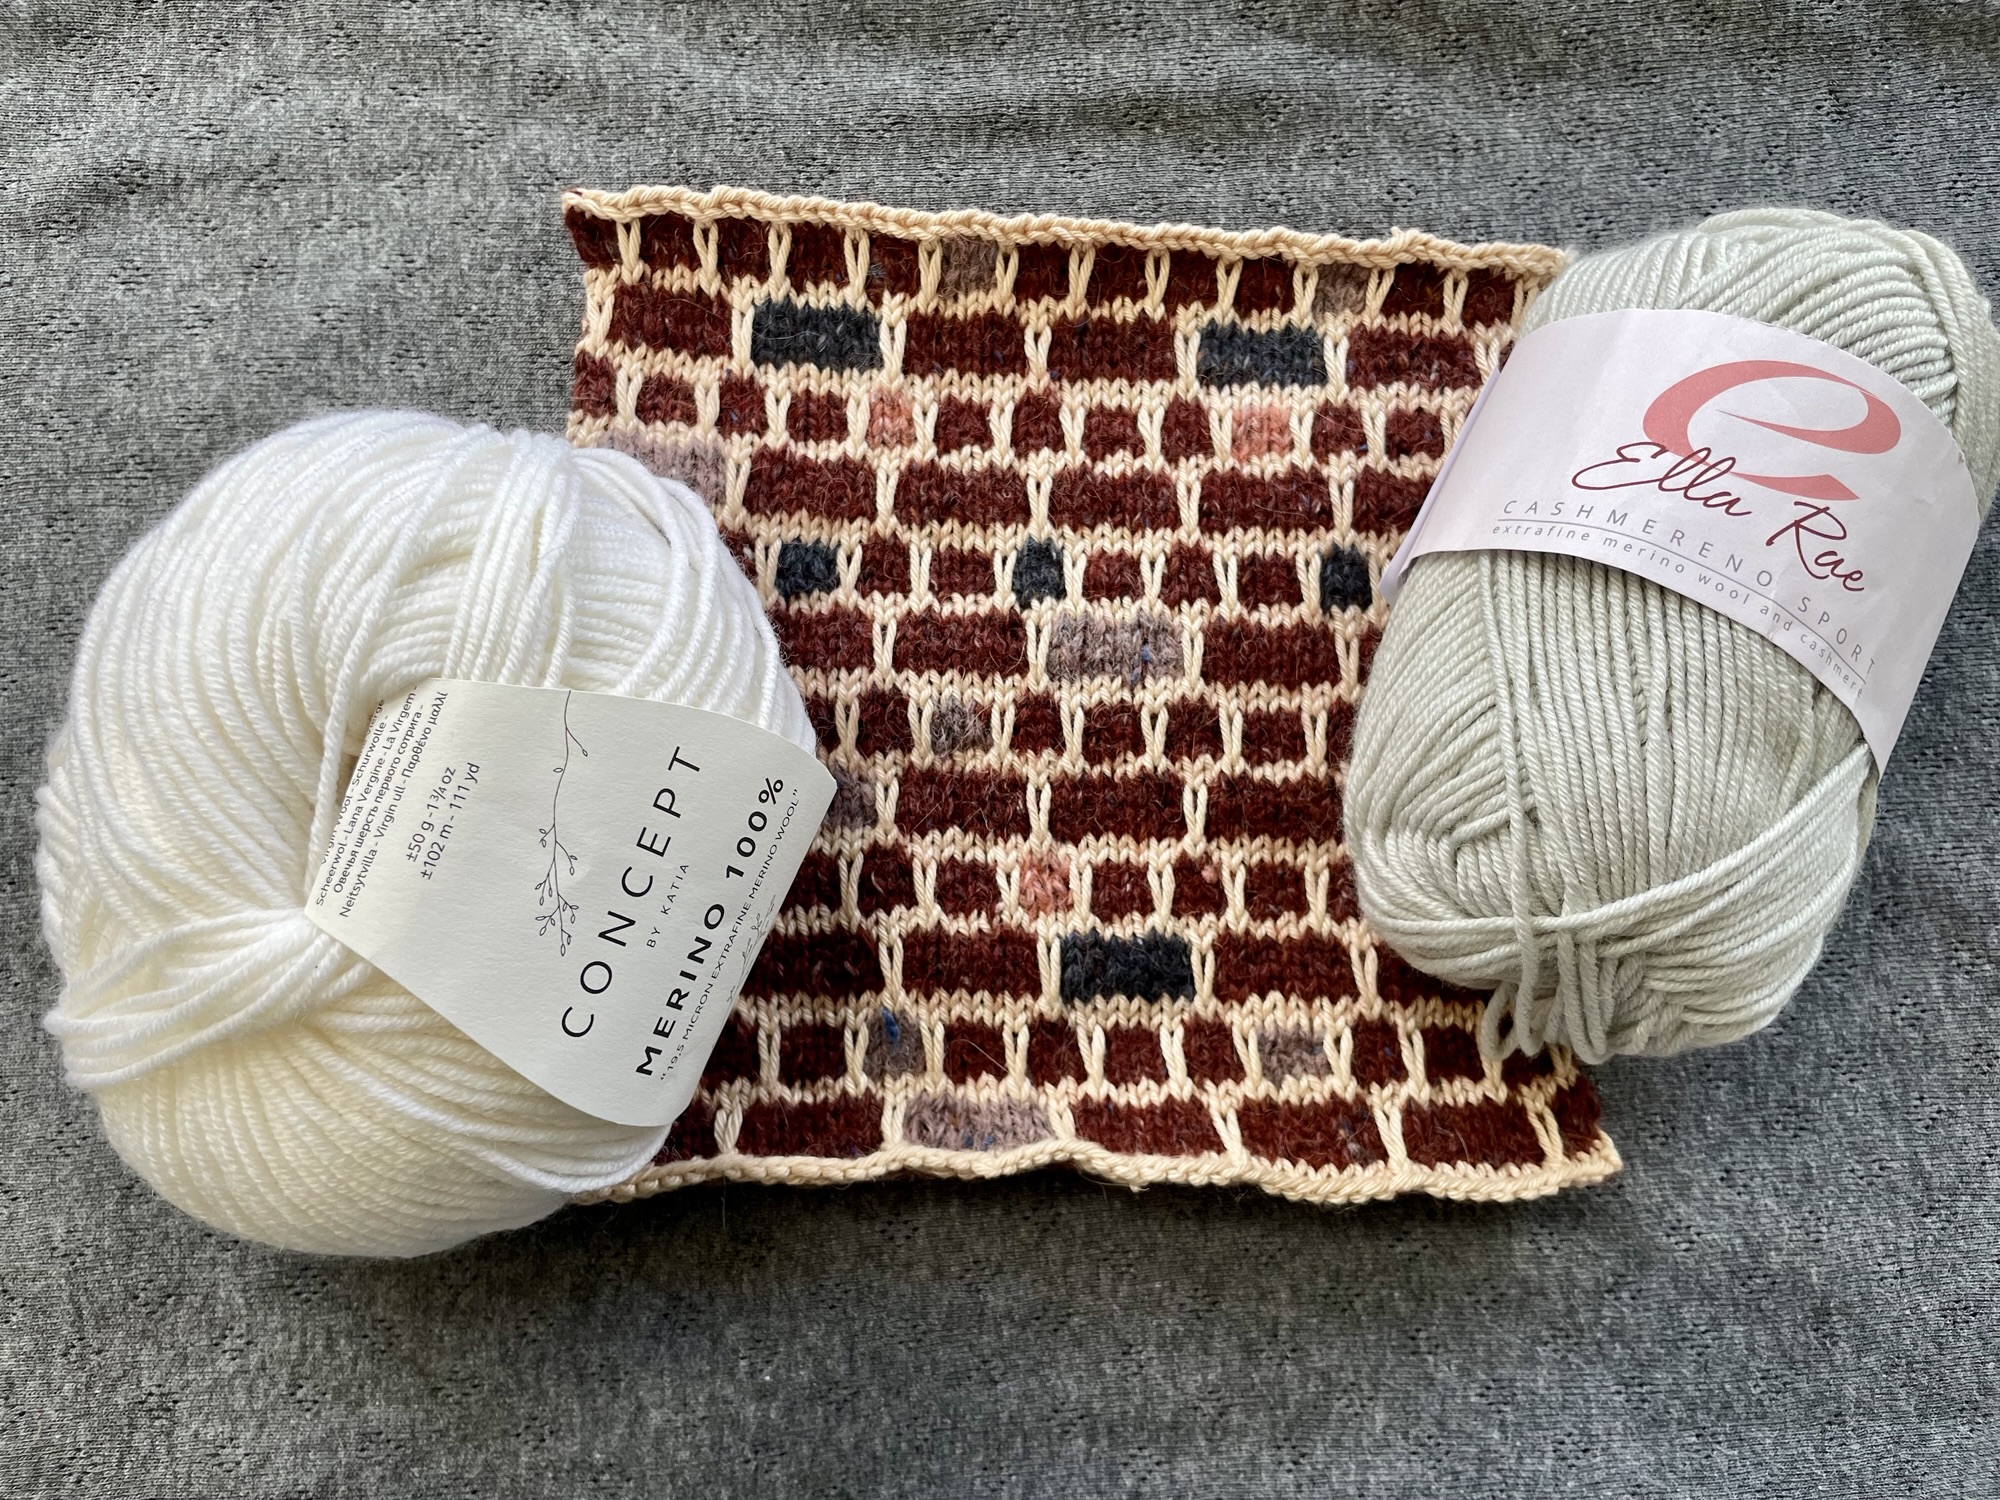
Just the yarn. I would dearly like to use Softyak DK because it’s lovely to knit. It’s also strong, which was helpful in the fiddly parts of the new pattern around the travelling stitch. But the Coast shade I’ve used for this test is the palest, and the square needs to be white or near white.
Although the grille is itself in white ironwork, I’d been thinking that I should avoid bright white because it’s so stark. I considered a very pale grey in my stash, but in life it’s a little greyer than in the pic below and it won’t quite give off ‘white’. So I’m going to risk pure white, which I hope will then tie in with other squares in the blanket that must be white to represent the stucco all along Dulwich Road. I’ll use the pale grey to create shadow when I come to those.
For the final square
- Follow the pattern as worked out in this test.
- Knit up using Katia Concept Merino shade Winter White (01), working out needle size to enable 18cm for 3 pattern repeats across the width and in height.
- If the white is too much, rip back and knit up with Ella Rae Cashmerino Sport shade Steel (04).
- Whatever the yarn, a safety line every 6 or 8 rows is vital.

Leave a comment